

Golf is a sport that requires a lot of time, effort, and money. It can be challenging for golf enthusiasts to keep up with the game during the offseason, especially in colder climates. Over the years, indoor golf simulators have grown in popularity – giving players a chance to practice their swings and enhance their game in the comfort of their homes or during the colder months. Here, we’ll take you through the steps to set up an indoor Golf Simulator.
Step 1: Choose the Right Space
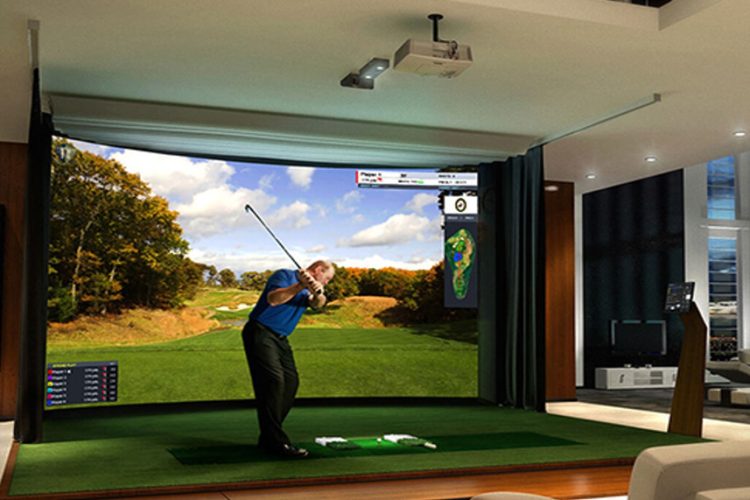
The first step to setting up an indoor golf simulator is choosing the best space. Ideally, you want a room with high ceilings and enough space to swing your clubs freely without worrying about damaging anything. A minimum ceiling height of 10 feet gets recommended, and a place of at least 10 feet wide and 15 feet long is necessary for a comfortable setup. The room should also have good ventilation, as it can get hot and stuffy during extended practice sessions.
Step 2: Install the Simulator Screen
With the ideal room selected, the next step is to install the simulator screen. The screen is the centerpiece of the simulator, and choose one gets compatible with your golf simulator software. Screens come in different sizes and shapes, so choose one that fits your space and budget. The most popular screens are impact screens, made of durable material that can withstand the force of golf balls hitting them.
Step 3: Set up the Golf Simulator Software
The software is what makes the indoor golf simulator tick. There are vast Golf Simulator software programs available on the market, each with its features and functions. It’s important to choose software that suits your needs and budget.
Once you have your software, set it up on a computer or laptop and connect it to the simulator screen. Follow the instructions comes with the software to install and configure it correctly. You’ll also need to calibrate the software to match the size and dimensions of your simulator space.
Step 4: Install the Golf Simulator Hardware
The hardware is what makes the simulator come to life. It includes a launch monitor, projector, and hitting the mat. The launch monitor tracks the ball’s flight and provides data on factors such as ball speed, spin rate, launch angle, and distance. The projector displays the simulation onto the screen, while the hitting mat provides a surface for you to swing from.
Some golfers prefer to buy a complete package that includes everything they need, while others prefer to get individual components separately.
Step 5: Calibrate and Test the System
Once you have everything set up, it’s time to calibrate and test the system. Calibration ensures that the launch monitors track the ball’s flight and gives accurate data. Most software programs come with calibration instructions that are easy to follow. Once you’ve calibrated the system, it’s time to test it out.
Start by hitting a few shots and analyzing the data provided by the launch monitor. Use this data to adjust your swing and improve your performance. Experiment with different clubs and swing styles on how the simulator works. Over time, you’ll be able to fine-tune your skills and improve your game.